


Don't miss out!
Subscribe via social media or newsletter to receive free photography tips.
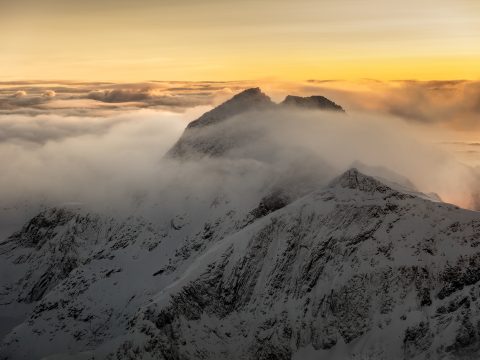
If you’ve ever experienced the desire to capture landscapes in all of their glory, then you’re not alone in your passion. Nature has been a muse, not just for photographers but all sorts of artists, since the beginning of time. There is inspiration to be found everywhere in the world around us and it’s all waiting for you to come along and photograph it. But what do you really need to get started with landscape photography?

I don’t know much about a lot of things in this Universe, though I can tell you that I’ve been a professional photographer for a long time now. For the past few years, I’ve specialised in landscape photography and it’s been an insightful, creative journey.
It wasn’t easy to get started and while I had lots of ideas that I wanted to pursue, I didn’t initially have a clue how to go about it. What ensued was a lot of bumbling around before I finally reached a place where I had the skills to capture my creative vision.
I’m not going to lie – landscape photography is usually an expensive passion but it doesn’t necessarily have to be. Like many other people, I struggled at the beginning with finances and learned to accept that I wouldn’t be able to afford the best gear. What I discovered though is that while it’s fun to buy new things, having the best camera doesn’t automatically turn you into a great landscape photographer, or any other type of photographer for that matter.
Getting started with landscape photography involves a lot of dedication and practice. If you’re willing to put some time into it, then I’m here to let you know what you need to do to take the plunge and explore your passion!
You can also navigate using the Table of Contents on the right-hand side of the screen.
Lots of photographers get caught in the trap of buying the best of anything and everything but you really don’t need very much gear to get started with landscape photography.
If you already have a camera, then that’s great! This means that you’ll just need a few other basic items.
If you haven’t purchased your first camera yet, then look for one that allows you to shoot in full manual mode – preferably one that comes bundled with a kit lens, as this will save you quite a bit of money.
Aside from that, what you need to immediately get started with landscape photography doesn’t include fancy equipment, filters or even a beautiful, natural backdrop.
You’re probably wondering now, “how can I take photos of landscapes without being out in nature?!”
Well, let’s take a minute to think about this next question: How can you take photos of anything without understanding photography itself?
One of the most-asked questions of landscape photographers is: “What camera do you use?”
Some people make the mistake of thinking that a camera takes amazing photos, when the real magic is done by the person behind it.
Although camera technology may be very advanced these days, you will still need to have a little talent and knowledge as a photographer to put your creative vision into action. You might have the best, most expensive camera on the market but in the end, the pictures that you take will only be as good as your skills.
If you don’t know how to shoot, then be prepared for the pictures on your smartphone to look better than any photo that comes out of your camera.
Camera technology is always making leaps and bounds, improving significantly within a short period of time. That’s the thing with cameras… they are constantly being updated. New technology is always being unveiled and the quality of cameras, as well as their ease-of-use, is getting better every day.
This is why you don’t need the best camera gear that’s out there right now. The truth is that whatever is on the market at present is going to become dated very quickly.
The best thing that you can do to get started with landscape photography is to invest time into learning photography as a whole. Once you have a good understanding of the foundations of photography, then you’ll be well-equipped to explore different genres and to find your own style.
So rather than buying the most expensive gear, start off by setting a photography goal to get to know the camera that you’ve got. Alternatively, you can purchase a cheap entry-level DSLR. Do your bit to shop ethically by looking in second-hand camera shops for pre-loved equipment.
As you begin to learn more about photography, you’ll very quickly come to identify what you want in a camera and the types of features that will best suit your needs. When you reach this point, you can look into selling your existing camera to someone else who might just be starting out with photography. It’s a good way to put the money from your old camera into a future camera upgrade.
If you’re just beginning your journey into photography, my advice is that you start out on an entry-level crop-sensor DSLR. As you begin bumping into limitations that hold back your creativity, start looking at investing in a newer full-frame model, which will help you to achieve your creative vision.
Whether you have a crop-sensor or a full-frame camera will affect which lens is best for you in terms of landscape photography.
If you’ve just bought your very first camera, then it’s very likely that you’ve purchased it with a kit lens in a bundle. This will most often be an 18-55mm f/3.5-f/5.6 zoom lens. It’s a good place to start but you may find that the kit lens is not as sharp or as versatile as you want it to be.
In general, a standard 24-70mm zoom lens makes for a great option to cover all bases. This focal range is often quite cheap to invest in and is useful for shooting general landscape images.
With practice, you’ll soon discover whether you need more reach to photograph things in the distance or to zoom out and have a wider angle of view.

Investing in your first lens as a landscape photographer can be quite daunting so aside from doing research before you buy, try borrowing the same lens from a friend or hiring one for a day. This way, you can get a feel for how it works and decide whether it’s something that will be useful for you in the long-run.
As you progress from beginner to more advanced, you’ll likely outgrow some of your lenses. Check out my lens recommendations for landscape photography if you’re not quite sure which lens will suit you best.
So, you’ve got the basics: a camera and a lens. You’re probably now very excited about all the places that you can go to where you can take beautiful pictures.
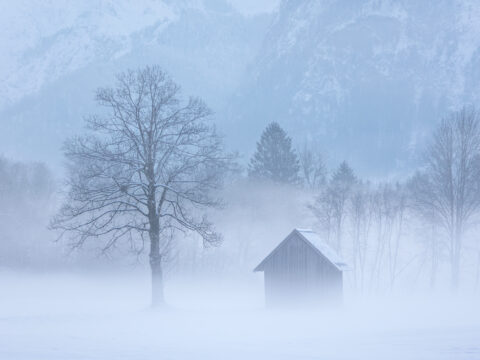
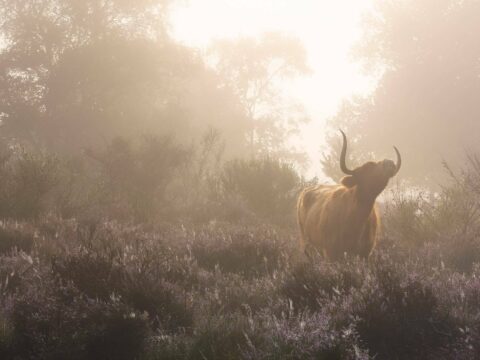
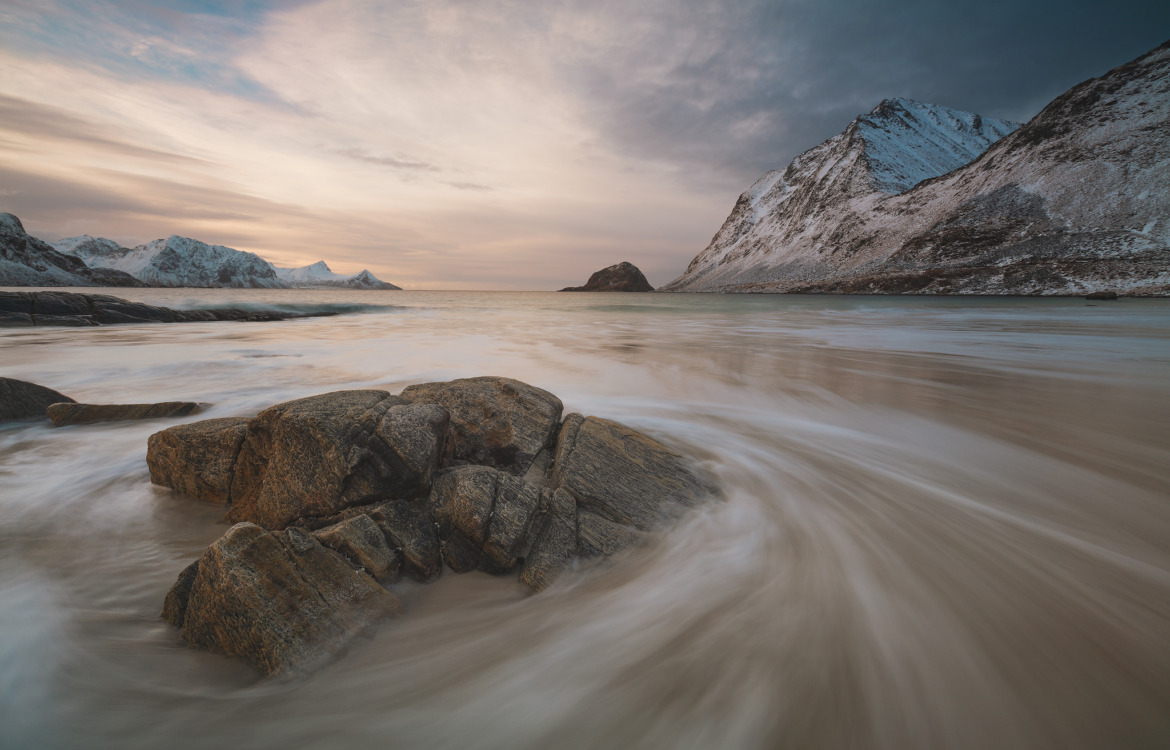
Some people travel far and wide for landscape photography. The reality is that you don’t have to stray very far away from home to get started. However, if you want to take the perfect shot out in nature, then you’ll need to concentrate on a few things:

You’ll also need to be physically fit enough to carry your gear and to reach certain locations. If you aren’t, then you’ll certainly need to find a means of getting around out in nature.
Above all else, you’ll need to have a solid grasp of photography techniques so that you can make the most of all the hard work and money you’ve invested into getting the shot.
Unfortunately, the easiest way to set yourself back in landscape photography is to try to do all of these things that I’ve mentioned at once.

So let’s get back to the basics and start by developing your photography skills. Take whatever camera you’ve got and walk down to your local park. Begin by photographing a tree or even the clouds in the sky somewhere close to where you live.
It may sound boring but this kind of exercise will help you to familiarise yourself with your gear. This way, you’ll have the skills and knowledge to capture beautiful landscape photos when you finally decide to travel further away or even abroad.
Once you’ve got the hang of shooting outdoors, it’s time to look at investing in a few other pieces of gear that will help you to become a successful landscape photographer. Figuring out which pieces of gear will be most beneficial to you takes time and practice.
I’ve spent the last couple of decades figuring out which accessories best suit my style of shooting and what I can afford to live without. During that time, I’ve bought a few items that have become staples in my camera bag. I’ve also wasted a lot of money on things I haven’t needed or weren’t as useful as I thought they would be.
There is an element of trial and error in deciding which items to invest in at the beginning of your foray into landscape photography. Until you get outdoors and start shooting different scenes on a regular basis, you’ll likely get sucked into the vicious cycle of buying things that you might not really use more than once.
Rather than compiling a giant wish-list, figure out the budget that you would like to spend and try not to go over it.
You can be a bit more gentle on your wallet by shopping at second-hand camera stores or looking for pre-loved cameras and used lenses or accessories online. You’d be surprised at the things that people get rid of! Things like camera bags, tripods, battery packs, memory cards, filters and lens extenders can often be purchased cheaply when you shop second-hand.
There are also bargains to be found in local Facebook groups, garage sales and even at thrift shops that don’t necessarily specialise in electronics.
By purchasing pre-loved camera equipment, you’ll be able to save money while doing your bit to look after the environment. Don’t worry if you accidentally buy something that doesn’t suit you and what you want to do. It means that you’re learning more about yourself and the style of landscape photography that you want to pursue. You can always donate items that are not useful back to the thrift store or sell them onwards.
An important item that I strongly recommend you purchase for landscape photography is a sturdy tripod that won’t blow over in the wind. Tripods are a must-have for creative photography techniques such as focus-stacking, long exposure photography, shooting at night and much more.
When choosing a tripod, look for one that comes up to your eye level without the middle column having to be extended. Also, make sure that it’s not too heavy to lug around, otherwise you’ll end up leaving it behind rather than taking it with you on your trips. Carbon fibre tripods are much lighter than their aluminium counterparts, though they’re also much more expensive.

What you may not be aware of is that tripod legs often come in three sections, four sections and sometimes even five. If you plan on travelling a lot or going on longer hikes, consider buying a 4-section tripod, as these pack down into a smaller size and will fit neatly into your luggage or backpack.
Another thing to be mindful of is that most tripods will come with a ballhead already attached but if yours doesn’t, then choose one that is quick and easy to adjust without too much fiddling. Also, make sure that it’s able to handle the weight of your camera with the heaviest lens attached, as the last thing you’ll want is for the ballhead to slip when you’ve lined up the perfect composition.
Here’s a step by step guide on how to photograph landscapes with a tripod.
You’ll learn very quickly as a landscape photographer that achieving a balanced exposure for both the sky and the foreground can be difficult, depending on the lighting. You can compensate for this by taking bracketed shots of different exposures and blending them during post-processing to produce an image of high dynamic range. Alternatively, you can try to do as much as you can in-camera by investing in a set of filters.
There are hundreds of different filters on the market and each is useful for creating different effects. For example, neutral density filters allow you to slow down your shutter speed for drawn-out clouds in the sky or to capture the silky motion of fast-flowing water. They also give you the ability to shoot at wider apertures in broad daylight for beautifully blurred backgrounds. Polarising filters help you to control reflections and glare, while graduated neutral density filters can help to balance the light in the environment.

When I first started out in photography, I had no idea where to begin with filters. Shopkeepers talked me into purchasing a circular UV filter to go on every one of my lenses but nobody ever clarified whether I really needed these. It wasn’t until a few years into my journey that I realised I didn’t really need them. They were extra pieces of glass that affected the way light travelled between my lens and camera sensor, which didn’t provide much benefit in landscape photography.
The only thing that they were useful for was protecting the front element of my lenses should I accidentally drop them onto a hard surface.
Eventually, I got around to experimenting with a circular neutral density filter for that special long exposure effect that you see so often in waterfall photography. At the time, I didn’t understand that lenses all have different filter threads. This meant that the filter would only fit one of my lenses and I would need to use step-up or step-down rings to fit the filter onto the other lenses. When I finally purchased these, I discovered that using a smaller filter with a step-up ring on a lens with a larger filter thread caused significant vignetting!
So my advice to you is that if you plan on starting a filter collection, think about whether you’d like to use the same filter across different lenses and all the filter thread variations that you might need to cover.
Square or rectangular filters are more versatile than circular screw-on filters, as you can use them with a filter holder that can fit all of your lenses. Attaching a filter holder with a square or rectangular filter that covers your entire front element also means that you won’t have to deal with any vignetting.
Buying filters can be a very expensive venture, so try looking in second-hand camera stores for used filters. You can also try networking with other photographers who are looking to sell their pre-loved filters onwards.
I use a range of neutral density, gradual neutral density and polarising filters for landscape photography. Feel free to take a look at which ones I have in my collection but keep in mind that what suits my style of photography won’t necessarily bring out the best of your own creativity.
Buying a camera and heading out into nature will only get you so far. If you’ve committed yourself to landscape photography, then be prepared to learn some very niche skills.
When photographers who are new to the genre ask me whether there are any courses or workshops they can take to learn how to photograph landscapes, my advice is to head down the following path:
As you spend more time outdoors with your camera, take the initiative to learn more about the following things:
In terms of joining courses or landscape photography tours and workshops, it’s important to learn from photographers that you respect and admire. Each one of us has a different perspective on how to capture the beauty of nature, so invest in someone whose values align with yours.
If you’re just starting out, look for a short beginner course that covers all of the basics of landscape photography. It might be a one-day workshop or a series of classes held once a week over a month, focusing on one subject at each session. After that, you can look at honing particular skills or immersing yourself in a workshop that takes you out into nature for several days, where all you’ll think about is photography 24/7.
When you need some advice, don’t be afraid to reach out to your favourite photographers. Some may be too busy to respond but that’s okay; there are plenty of other photographers who’ll have a little more time up their sleeves.
If you want to become a professional landscape photographer, then find yourself a mentor. Mentoring is a very valuable thing that can lead you on the path to success. When looking for a mentor, decide whether you want to enter into an informal long-term mentorship or to pay for a few formal sessions to achieve some quick insight into improving yourself as a landscape photographer.
You can learn more here about what I offer in my mentorship program.
When I first started out with photography as a kid, I used disposable cameras loaded with ISO 400 colour film. This was how I learned about the limitations of a point and shoot, as well as the importance of being able to adjust settings in order to achieve a balanced exposure.
By the time that I turned 17, I had saved up enough money to purchase an entry-level DSLR, which I practised shooting with for hours in the backyard. I also took it with me everywhere that I went, including birthday parties, day trips to the city, lunch dates and other events. Very quickly, I learnt to use every single function in my camera and soon decided to upgrade to a professional-grade DSLR.
Many years later, when I began to explore landscape photography more seriously, I already had several cameras and lenses from a photography career that had spanned a couple of decades. However, I still needed to purchase a few accessories specific to shooting landscapes.
This is a rundown of how I saved and invested in my camera gear specifically for landscape photography.

I was very fortunate in that when I decided to take landscape photography more seriously, I already had great lenses that I could use from years of working in other genres of photography. This is why my advice to you is to invest in the best lenses that you can afford, in order to cover a focal range from ultra wide to telephoto. You’ll be able to use them for other purposes as well – not just for photographing nature.
Read more here about which lenses I recommend for landscape photography.
That was a lot of information to digest so here’s a summary of what I’ve mentioned in this post about what you need to get started with landscape photography:
By limiting yourself to using what you already have, you’ll be able to figure out where the gaps are in your camera gear and photography knowledge so that you can invest in your newfound passion appropriately.
As you develop your landscape photography skills, continue to self-evaluate by asking yourself the following questions:
Questions like these will allow you to figure out whether you need to upgrade your camera equipment or if it’s a better idea to work on your skills in other areas of photography, such as composing and editing a shot.
When you have a good understanding of photography as a whole, seek a mentor or learn from landscape photographers whom you respect and admire. Don’t be afraid to ask for critical feedback as it’s an important part of the learning process that can help you to improve your landscape photography skills, both in-field and out.
Above all else, try to keep yourself physically fit so that you can spend more time out in nature, doing what you love.
Have you started your own journey into landscape photography? What has it been like? Do you have any advice to give to your younger self? Leave a comment below!
Did you find this article helpful? If so, please consider making a small donation to support me and my photography. It will keep my work going!
I love sharing my knowledge about photography and I hope you love to read it! All of my content is free on this site, Instagram and Facebook.

Subscribe via social media or newsletter to receive free photography tips.